Handling Height in Isometric Tile Maps
Published on Wednesday, February 2nd, 2022
Some of my favorite games are isometric styled. I played a lot of "Super Mario RPG" and "Final Fantasy Tactics" in my day and I've always wanted to build isometric games 😎
With that desire in mind, I've been working on Tiled map editor support for Excalibur. Simulating and drawing tiles at a certain height can be tricky with z-indexing. In this post I'll talk about drawing isometric maps and some of the techniques I used to produce a height illusion in an isometric map with a moving character.
TLDR show me the code
Isometric Math
There is a great post by Clint Bellanger that goes into detail about the derivation of the math. I highly recommend reading his post for a nuanced understanding of the math.
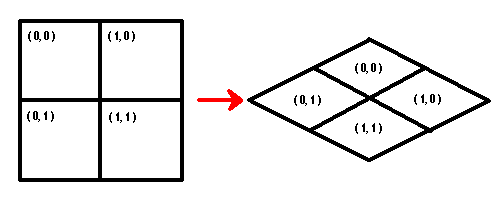
Here is the basics though: given a 2D grid of tiles, we need to draw it effectively rotated by 45 degrees to produce the isometric 2.5 illusion. A common approach to drawing this in pixel art this is 2 pixels over and 1 down.
Okay let's say our tile data structure looks like below, each tile has its x/y coordinate, a screen position, and a image to show, and the IsometricMap contains a list of Tiles.
export class Tile {
    public x: number;
    public y: number;
    public screenX: number;
    public screenY: number;
    public image: HTMLImageElement;
    constructor(public map: IsometricMap) { }
}

export class IsometricMap {
    public tiles: Tile[] = [];
    constructor(
        public widthInTiles: number,
        public heightInTiles: number,
        public tileWidthPx: number,
        public tileHeightPx: number) {}
}
Calculating Screen Position
Here is my verbal reasoning for the isometric formula, again I recommend reading Clint's post for more nuance.
- For each positive step in x tile coordinate, the final drawing is shifted down screen y and right in screen x by half a tile
- For each positive step in y tile coordinate, the final drawing is shifted down screen y and left in screen x by half a tile
If we combine all the x changes and y changes we get:
export class IsometricMap {
    ...

    /**
     * Returns the top left corner of the tile in screen coordinates
     */
    public tileCoordinateToScreen(tileX: number, tileY: number): [number, number] {
        const halfTileWidth = this.tileWidthPx / 2;
        const halfTileHeight = this.tileHeightPx / 2;
        // each screen x is dependent on tile.x to the right & tile.y to the left
        const screenX = (tileX - tileY) * halfTileWidth;
        // each screen y is dependent on tile.x down & tile.y down
        const screenY = (tileX + tileY) * halfTileHeight;
        return [screenX, screenY];
    }
}
Selecting Tile width and height based on assets
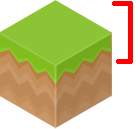
The tile height should be the height of the base parallelogram not the height of the tile image asset necessarily.
For example if your tile is "flat", the height of the parallelogram and the image are the same.

With other art assets the logical height can be different, in this case roughly half the height of the asset. This height will depend on your art assets.
Drawing isometric tiles
Drawing isometric maps can be slightly different from your traditional 2D maps, specifically it is often convenient to draw isometric tiles from the bottom left instead of the top right in the traditional 2D case. (The Tiled editor does this)
One reason to draw from the bottom, is this preserves the mental model of placing a 3D object down on the grid
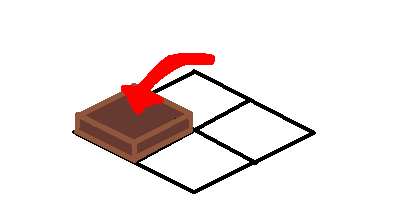
To accomplish this we need to offset our screen coordinates, by the full height of our tile image.
export class Tile {
    public x: number;
    public y: number;
    public screenX: number;
    public screenY: number;
    public image: HTMLImageElement;
    constructor(public map: IsometricMap) { }

    public draw(gfx: CanvasRenderingContext2D) {
        if (!this.image) return;
        const halfTileWidth = this.image.width / 2;
        gfx.save();
        // shift left origin to corner of map, not the left corner of the first sprite
        gfx.translate(-halfTileWidth, 0);
        gfx.translate(this.screenX, this.screenY);
        // shift the image up to draw from the bottom (minus tile height)
        gfx.drawImage(this.image, 0, -(this.image.height - this.map.tileHeightPx));

        gfx.restore();
    }
}
Multiple isometric tiles at different "elevation"
This is were things can get tricky, because as a player or objects move in your environment the order in which each tile or object needs be drawn must change to preserve the illusion.
Conceptually, as objects move "closer" to the screen they need to be drawn last (the classic painter technique of painting close things last).
Z-index is a useful way to think about closeness to the screen that developers might be familiar with. Given a high z-index, this means an object is close to the screen, and low z-index further away.
Solution: Sort entity draw by z-index
One way to make the illusion work is to sort our objects by a z-index that we calculate every frame from a synthetic "elevation".
First add z and elevation to your entity implementation.
export interface Entity {
    z: number; // distance to the screen
    elevation: number; // "height" of the layer in the illusion
}

export class Tile implements Entity {
    ...
    // add z and elevation to implementation
}

export class Player implements Entity {
    ...
    // add z and elevation to implementation
}
Set your entities to the desired elevation for your simulation.
// Set the elevation of the ground tiles
const ground = new IsometricMap(...);
ground.tiles.forEach(t => t.elevation = 0);

// Set the elevation of the box tiles
const boxes = new IsometricMap(...);
boxes.tiles.forEach(t => t.elevation = 1);

// Set the elevation of the player, the player will be at the
// same elevation as the boxes
const player = new Player(....);
player.elevation = 1;
Process through all the entities' elevation and calculate the correct z-index given their position on screen at any given time, then sort before drawing them all. This lets object move about and retain the proper draw order based on z-index.
The trick is to pick the maximum possible y-coordinate for your game screen, this allows you to bucket each elevation into its own range of z-indexes. For example the grass tiles will never be drawn in front of the box tiles because they are at a different elevation.
// Some canvas details omitted for brevity
// See full code: https://github.com/eonarheim/isometric-layers

const entities = [...ground.tiles, ...boxes.tiles, player];

const processElevation = (entity: Entity) => {
    const maxZIndexPerElevation = 600;

    const newZ = maxZIndexPerElevation * entity.elevation + entity.screenY;

    entity.z = newZ;
}

const clearScreen = (gfx: CanvasRenderingContext2D) => {
    gfx.fillStyle = '#176BAA';
    gfx.fillRect(0, 0, canvas.width, canvas.height);
}

const mainloop = () => {
    requestAnimationFrame(mainloop);
    clearScreen(gfx);

    // Given the elevation and y coord calculate the correct z-index
    entities.forEach(e => processElevation(e));

    // Sort entities in place
    entities.sort((a, b) => {
        return a.z - b.z;
    });

    // Draw our entities
    gfx.save();
    gfx.translate(400, 100);
    for (const entity of entities) {
        entity.draw(gfx);
    }

    gfx.restore();

}
mainloop();
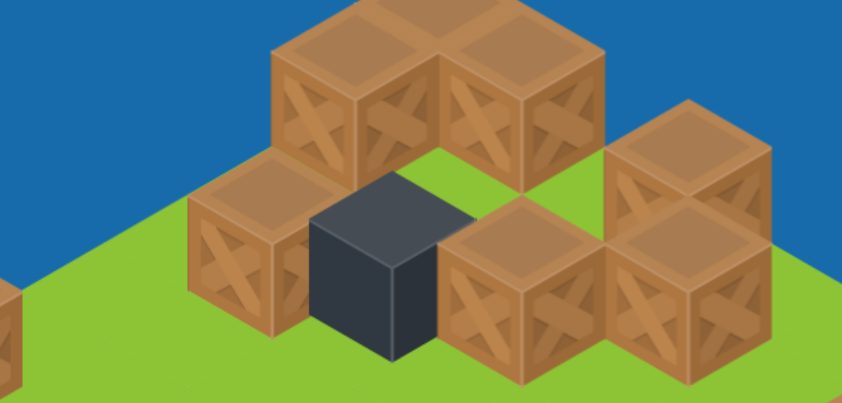
Voila! 🎉
In this example all the green grass tiles have elevation = 0 and the black cube and boxes have elevation = 1. Notice how the black cube is properly in front of the box tile to the left, but behind the box tile to the right.
Check out the code and play around
Hope this helps you isometric game enthusiasts out there!
-Erik
Help support me on Github Sponsors or Patreon
Become a Patron!